When creating the soap dish, I had to follow a series of steps to create the form using stiff slabs. First, I received clay from the pug mill. I had to start out by wedging and flattening the clay at the back table. This involved picking up the clay and throwing it down several times. After doing this, I took the clay to the slab roller to flatten it some more. Using the slab roller was a new experience for me. To use it, I had to lay the slab on a paper surface. Then I wrapped the clothe on the slab roller so that it could cover the slab of clay. After rolling the slab through the slab roller, I had to flip it and retrieve it from the clothe. Once I was finished with the slab roller, I moved on to use templates to cut out each slab using a fettling knife. Like the slab roller, the fettling knife was also a new tool for me; however, it was a simple tool to master. It is a knife that is used to cut clay, and in this case, I used the knife to cut out the templates. Once I cut out the new slabs, I layered them between newspapers. I folded the newspaper so it fitted on the ware board. The slabs were much harder in texture. I scored the slabs with the serrated scraper and then smoothed them out with a scraper and with the rubber rib, which offered the same results as the scraper. It was my first time using the rubber rib. Then, I applied slip, which was a liquid clay that dried up to form solid. I used this to connect the slabs together. Before I connected the slabs, however, I made sure that the slabs were smoothed out and straightened. I used slip and extra clay to make sure that the slabs were solid and firm. I made sure to go slow and place one wall at a time, smoothing them out and applying slip to assure the firmness of the object. This project required the use of dry clay, which makes it difficult to move the clay. Soft clay is usually easy to manage and can easily be applied to an object (creating an object or rubbing soft clay in to smooth out cracks or enlarge the sides of the object). I found that although soft clay is easier to handle, the hard clay was better when creating strong foundations for an object. Using hard clay introduced me to this new way of constructing clay. Hard clay required me to stack the slabs together and reinforce it with slip. I saw that the object was much more secure then if soft clay were used.
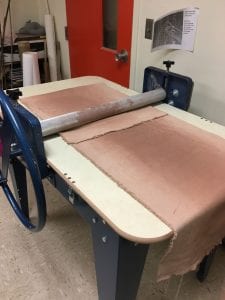 After wedging and flattening the clay at the back table, the clay was then rolled through the slab roller, which caused the clay to be flat enough to cut out the templates.

After setting up all the slab pieces and building the slabs, this was how the soap dish was formed. It was formed in a three-denominational rectangle that is able to hold the soap.

A big factor in forming the soap dish was the use of slip, which is liquid clay used like glue. I used this to connect the walls and the bases together.